
4 Best Solar Panel for Trail Camera for Remote Camps
The WingHome Trail Camera Solar Panel is the top pick for most buyers, making it the best solar panel for trail camera setups that need steady off-grid power. Its solar charging design can reduce battery changes at remote locations, where frequent visits are inconvenient.
This guide is for hunters, wildlife watchers, and landowners who want longer camera operation without relying entirely on disposable cells. The key factors are panel size, charging output, weather-resistant materials, and connector compatibility. A larger panel may collect more sunlight, but it can also draw attention or prove awkward to mount on a narrow tree. The four picks below are ranked by practical fit, with clear reasons and honest drawbacks for each, so you can choose a solar charger that matches your site and camera.
Quick Comparison
| # | Product | Best For | Price | |
|---|---|---|---|---|
| 1 | WingHome Trail Camera Solar Panel | Long-Term Remote Camera Setups | $53.99 | View → |
| 2 | Stealth CAM Sol-Pak Solar Battery Pack | Off-Grid Hunters Needing Backup Power | $44.53 | View → |
| 3 | Solar Panel Charger for Trail Cameras | Budget-Conscious Trail Camera Owners | $28.99 | View → |
| 4 | SPYPOINT SPLB-10 Solar Panel | SPYPOINT Camera Users in Open Terrain | $59.99 | View → |
4 Top Solar Chargers for Trail Cameras
The list is ranked by charging output, compatibility, and mounting flexibility, counting down to the strongest overall pick.
4. SPYPOINT SPLB-10 Solar Panel

Best for: Remote trail cameras with limited access
The SPYPOINT SPLB-10 combines a solar panel and internal lithium battery in one compact housing. Instead of connecting a separate panel to an external battery, you get a single power unit for a compatible trail camera. Sunlight helps recharge the battery, which can keep the camera running longer between site visits. That setup can reduce cable clutter and simplify installation in the field.
Its main advantage is flexibility. The unit includes a 12V output, plus separate 9V and 6V power outlets for other compatible equipment, such as a deer feeder. This makes it more useful than a panel designed for one voltage only. Still, buyers should confirm the camera’s voltage, connector, and power requirements before ordering. The listed features do not provide the battery’s capacity, charging time, or expected runtime, so performance will depend on sunlight, camera settings, and connected equipment. At around $60, it costs more than a basic solar panel, but the built-in battery may reduce the need for extra parts.
Pros
- Combines the solar panel and lithium battery in one compact unit.
- Offers 12V, 9V, and 6V outputs for different compatible devices.
- Reduces loose wiring and can extend trail camera operating time.
Cons
- Battery capacity, charging time, and runtime are not specified.
- Requires strong sunlight and correct voltage and connector matching.
3. Solar Panel Charger for Trail Cameras

Best for: Remote trail cameras with limited access
This 6W solar charger is designed to keep a compatible trail camera powered outdoors. It uses a 12V output and includes a 6000mAh rechargeable battery, so the panel can store energy for periods without direct sunlight. At 535 grams, it is light enough for tree, roof, or backyard mounting without adding much weight to the setup. The price is around $29.
The adjustable bracket rotates 360 degrees, giving you more control over the panel’s position throughout the day. It supports USB, USB-C, and DC connections, but you must confirm that your camera uses a compatible connector and voltage before buying. An IP66 weather-resistant design helps protect the unit from rain, snow, heat, and cold. Installation should be fairly simple, though the best results still depend on placing the panel where it receives strong, unobstructed sunlight.
Pros
- A 6000mAh battery can provide stored power when sunlight is limited.
- The 360-degree bracket allows flexible positioning on trees, roofs, or other mounts.
- USB, USB-C, and DC ports support several camera connection types.
Cons
- Solar charging slows in shade, storms, winter conditions, and heavily wooded areas.
- Compatibility is not universal, so the camera’s connector and 12V power requirements need checking first.
2. Stealth CAM Sol-Pak Solar Battery Pack
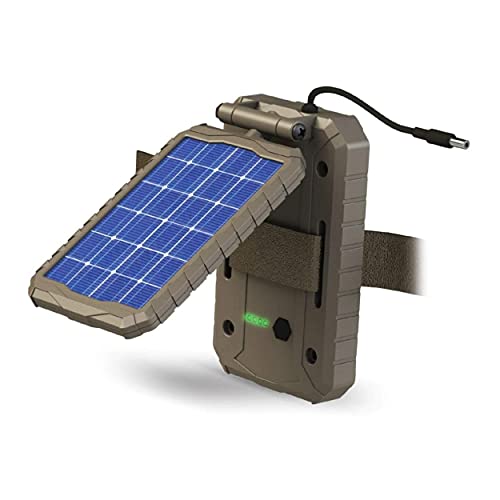
Best for: Stealth Cam users in remote hunting areas
The Stealth CAM Sol-Pak combines a 12V amorphous solar panel with a 3000mAh lithium-ion battery. It connects to compatible Stealth Cam wireless and cellular trail cameras through an external 12V DC jack. At around $45, it can reduce trips for battery changes, though camera performance still depends on weather, signal, and power use.
Several practical details make this pack easier to place outdoors. An adjustable T-swivel bracket helps aim the panel toward available sunlight, while the 10-foot insulated metal cable gives you more mounting flexibility. The weather-resistant ABS housing should handle outdoor exposure better than an unprotected battery pack. A built-in LED indicator shows remaining battery power, and the secure-lock DC plug helps keep the connection in place. The USB port adds another charging option, while the 12V input can connect multiple panels for certain setups.
Pros
- The 3000mAh battery can extend camera operation between charging visits.
- The 10-foot cable and adjustable T-swivel bracket support flexible installation.
- The LED indicator provides a quick view of remaining battery power.
Cons
- Compatibility is limited to Stealth Cam cameras with an external 12V DC jack.
- Solar charging can drop during extended cloudy periods, and the housing is weather-resistant, not confirmed waterproof.
1. WingHome Trail Camera Solar Panel
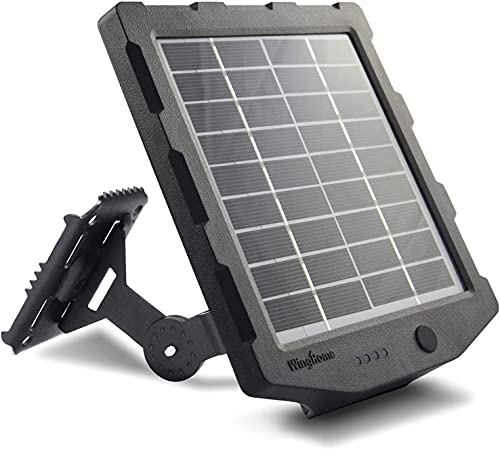
Best for: Remote trail cameras with sunlight
This WingHome solar charger supports trail cameras and outdoor security devices that use either 6V or 12V power. It delivers up to 1.5A at 6V or 1A at 12V, with plug options for 4.0 × 1.7mm and 5.5 × 2.1mm connections. A built-in 2,000mAh rechargeable lithium battery stores power for periods when sunlight drops. The IP66-rated housing is made for outdoor exposure, although placement still matters.
The kit includes the panel, a mounting bracket, three cables, a DC charger, and mounting hardware. Pre-drilled holes on the panel’s back and bottom support a quicker setup, with the manufacturer estimating under five minutes for installation. At around $54, it costs more upfront than a pack of disposable batteries, but solar charging can reduce battery purchases over a long season. Compatibility requires checking both your camera’s voltage and plug size first.
Pros
- Supports both 6V and 12V cameras, with two common barrel-plug sizes.
- Built-in 2,000mAh battery provides stored power during cloudy periods or darkness.
- Includes the panel, bracket, three cables, charger, and installation hardware.
Cons
- It needs adequate sunlight, so shaded locations may still require camera battery changes.
- Compatibility is not universal. Cameras with different voltage requirements or plug dimensions will not connect directly.
Buying Guide
The most important factor is electrical compatibility. Match the panel’s output voltage, connector size, and polarity to your trail camera, because an incorrect setup can stop charging or damage the camera.
- Output wattage: Choose a panel rated for the camera’s input. A 5W to 10W model suits many low-power cameras, while 10W to 20W works better in shaded woods or cloudy regions.
- Connector compatibility: Confirm the plug type, voltage, and polarity before buying. Common options include 5.5mm barrel plugs, USB, and camera-specific connectors. An adapter does not always fix voltage differences.
- Battery backup: Pick a unit with an internal rechargeable battery of at least 5,000mAh. This reserve can keep a camera running through several cloudy days, depending on trigger frequency and temperature.
- Weather protection and mounting: Look for an IP65 or higher rating, UV-resistant housing, and a mounting bracket with a 90-degree adjustment range. A 6- to 10-foot cable helps place the panel above shade.
- Size and price: Panels around 6 by 8 inches fit many tree setups, while larger 8 by 12-inch models collect more light. Expect to spend about $25 to $80 for a camera-specific solar charger.
If you cannot have everything, prioritize exact electrical compatibility over panel size or extra features.
Frequently Asked Questions
How do you choose a solar panel for a trail camera?
Choose a solar panel that matches your camera’s voltage, connector, and mounting needs, with a built-in battery for cloudy periods. A 6V panel suits many 6V hunting cameras, but confirm the camera manual before buying. Aim for a 10-foot cable if the panel must sit above shade or away from the camera.
What size solar panel do trail cameras need?
Most trail cameras work with a 5W to 10W solar panel, but the correct choice depends on the camera’s input voltage and power use. A 6V camera often pairs with a 6V panel and an internal battery pack. Check the plug size and polarity, since matching voltage alone does not guarantee compatibility.
Can a solar charger keep a trail camera running?
Yes, a properly matched solar charger can keep a trail camera running for months, but shade, winter sun, and frequent triggers may still drain its battery. A panel with a 2,000mAh or larger backup battery gives the camera stored power overnight and during cloudy weather. Position it toward the strongest daylight, not beneath dense branches.
Are solar panels safe for trail cameras?
Yes, solar panels made for trail cameras are generally safe when their voltage, connector, and polarity match the camera. Look for weather-resistant housing and a sealed cable connection, especially in exposed locations. A 6V camera should not receive power from a 12V panel unless a compatible regulator is included.
Conclusion
WingHome Trail Camera Solar Panel is the top pick for hunters and property owners who want a simple, low-maintenance power source for one compatible camera. It suits setups where regular battery changes are inconvenient, especially cameras mounted far from a house or cabin. If your priority is longer runtime in shaded woods, choose a higher-output panel or a two-panel kit instead, since extra collection area can help during cloudy stretches. Before buying, double-check the panel’s size, camera compatibility, included cable and connector, quantity, mounting hardware, and current price. A solar charger cannot fix a poor camera location, so place it where the panel gets several hours of clear daylight and keep the lens free from nearby branches.